


It has all gone a bit 3D!
- esmesvintagecloset

- Feb 21, 2022
- 5 min read
Updated: Feb 26, 2022
This will be the post where the jacket really and truly starts to come to life, it goes from being a 2D flat shape, to a 3D "something" that will resemble the finished garment. Huzzah!
Not that this means it is by any means finished, because it totally is not. Not even close. To quote Winston Churchill, "this is not the end, it is not even the beginning of the end, but it is, perhaps, the end of the beginning." Well, maybe in terms of the making of this jacket. In terms of the project as a whole, I have only just got my boots on.
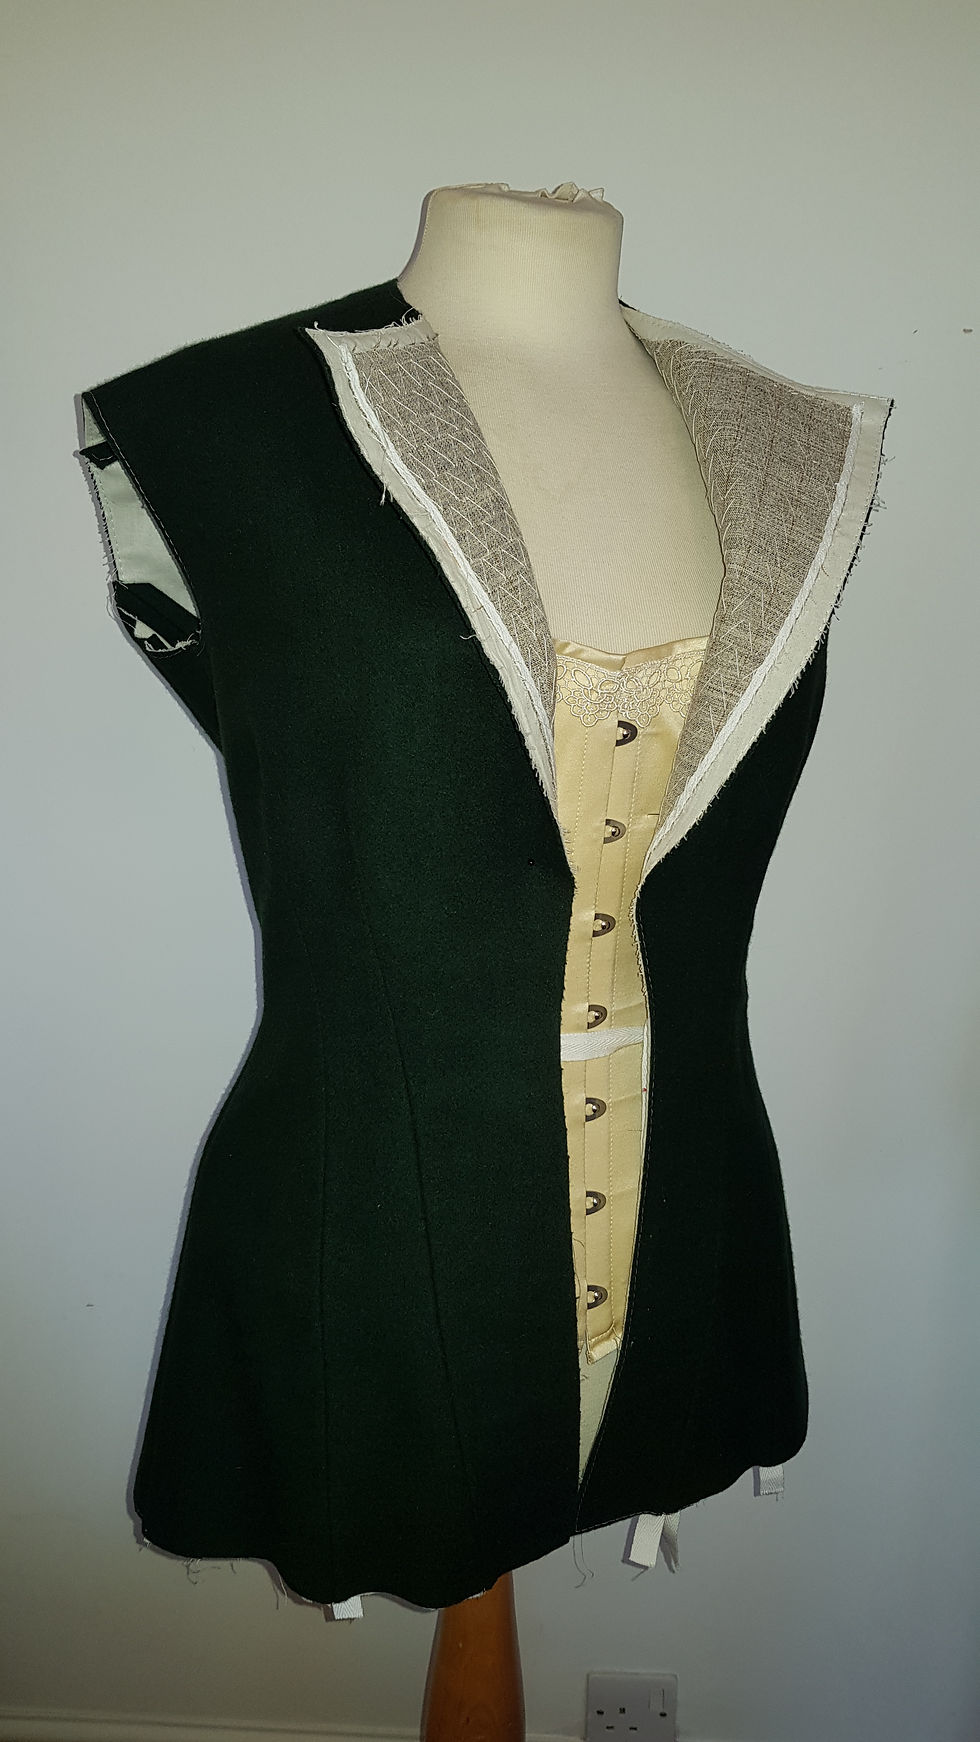
Even without sleeves attached, it does give me the first real chance to double check fit and see whether the modifications I have made to the pattern thus far have actually done what I intended... If I need to alter anything, now is the time to do that.
I had been pondering whether or not to add a horsehair canvas interfacing layer to the front jacket pieces. Remembering how I felt about the 1890s Black Snail waistcoat I made during lockdown, and how beautifully it holds its shape, I decided to go with it.

Following the example in the Black Snail pattern, I quickly traced off another version of the jacket front from my master copy of the pattern. I did not want the horsehair canvas to cover the whole of the jacket front, so I left the canvas intact from the waist down between the first dart and the centre front edge. I then cut the canvas to follow the line of the first dart up from the hem, over the point and down to the waistline marker on the opposite side of the dart, cut across the waistline marker to the next dart, cut up and around the second dart, and then cut across along the waistline to the side seam.
As per the Black Snail pattern, I also trimmed 1/2" seam allowance from the canvas up the side seam, around the armscye, across the shoulder seam, around the neck, down the centre front and across the bottom edge : the idea is to strengthen and shape, without adding bulk at the seam allowances or darts.

With the canvas basted in place, I needed to apply 1/4" cotton twill tape to the front edge of the jacket. I basted my tape to the very edge of the canvas (so that both sides of the tape were on the canvas).
As I don't need the jacket lapels
to roll back and lie flat against the jacket, as they would in a conventional suit, I will not be taping the break line of the lapel. Normally, a tailor would also run the tape across the top of the lapel and into the collar, to force it to lie flat against the chest, but I have opted not to do this as I do not want the lapel to lie perfectly flat against my chest.
Pad stitching the lapel area will encourage it to stand out, rather than flop back.
Then came all that pad stitching!!! Pad stitching involves a diagonal stitch to attach the the horsehair canvas to the cotton interlining. I was really careful to make sure that I did not catch too deep into the wool as I did not want the wool to show any "pick up"* from the pad stitching. I spent a very chilled afternoon and evening, sat cross legged on my sofa, pad stitching away, whilst catching up on the Olympic figure skating.
All the hand sewing being done, Trusty Jack's first job was to join each of the front pieces at the shoulders to the already assembled back panels and then to join the fronts to the back at the side seams.
The sleeve of TV428 is the standard two piece sleeve from the late Victorian era. I have joined the under sleeve pieces to the upper sleeve pieces on the front edge (note: they are not flatlined with the cotton I used for the body of the jacket, and will just be lined with my lining fabric).
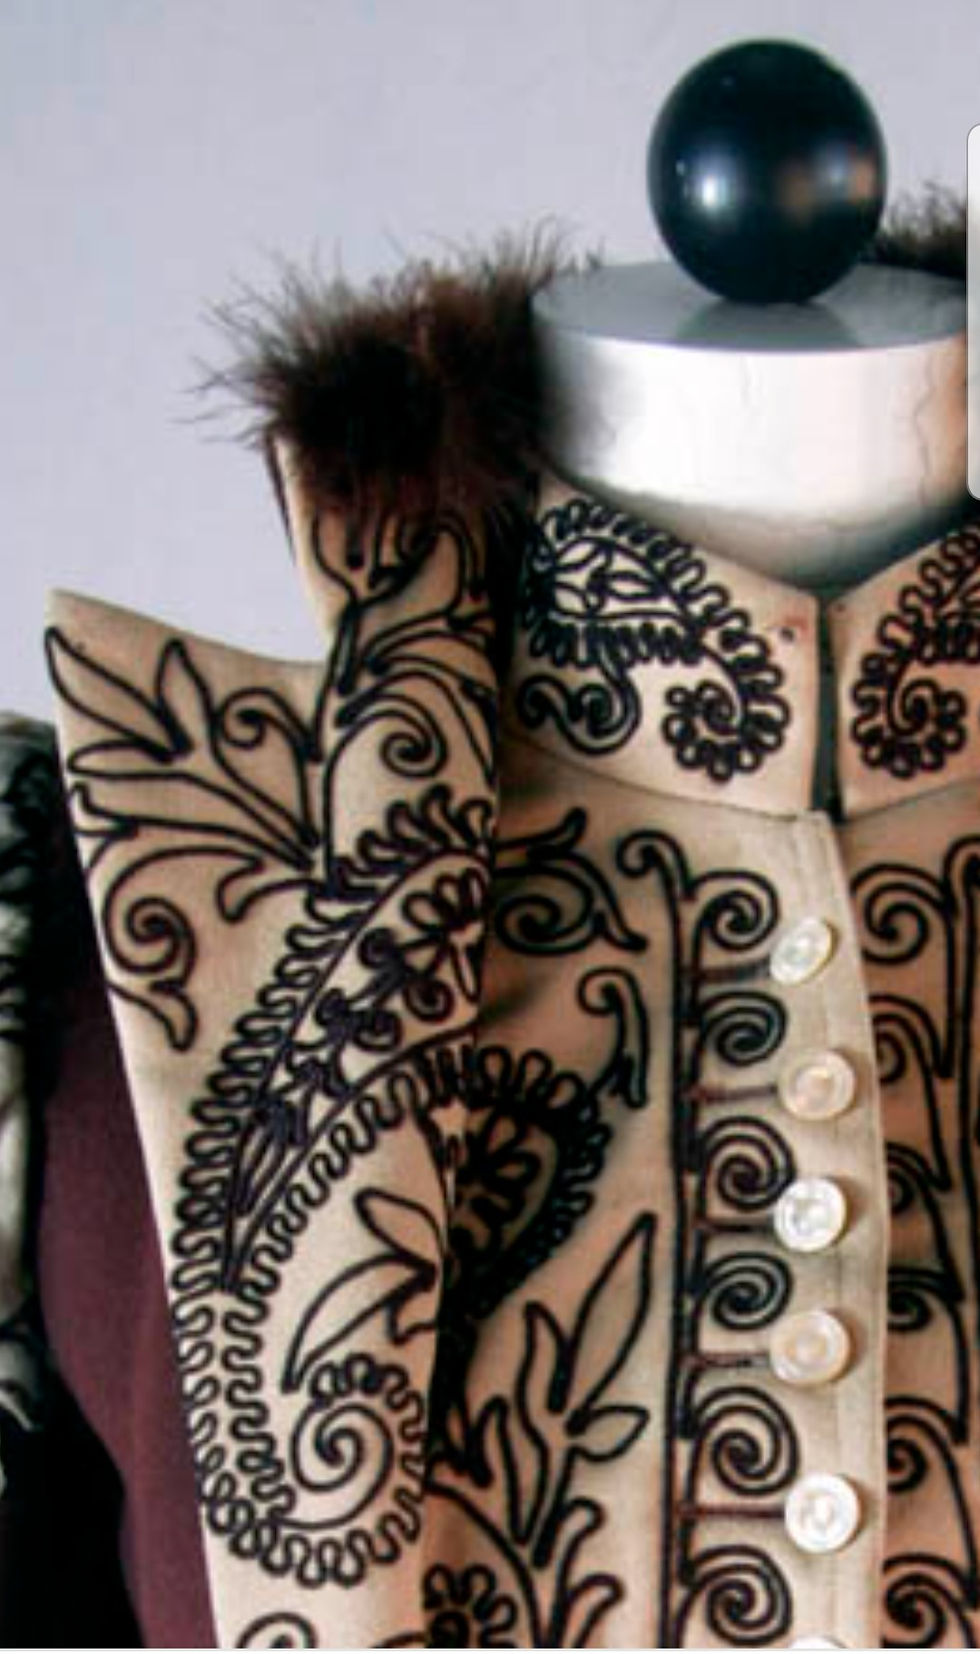
However, the sleeves will require appliquéd embroidered panels. Attaching the appliquéd panels whilst each sleeve is still effectively a flat panel will give me a far greater degree of accuracy, control and flexibility over their placement and will make the process of actually attaching the panels much easier than it would be if the sleeves were a 3D tubular shape.
So whilst the sleeves are partially assembled, I am not yet ready to attach them to the jacket body. I have, however, put two tiny tacks in where the sleeve head will be gathered into the armscye on the bodice, and marked a point 6.5" up from the cuff edge to indicate where I want the appliqued embroidery panels to sit.
With the body assembled, I hand stitched the boning channels in place, ready for the boning to go in after the sleeves have been attached - it will be easier to manipulate the jacket as I stitch without the boning already inserted.
Whilst I had my twill boning channel tape to hand, I stitched three short lengths of tape into the collar of the jacket - one at the centre back, and one at each end. I will use the synthetic whalebone for this, as it can easily be shaped with a little gentle heat to give that slight curve seen on the original garment.
I had originally planned to leave the inside of the collar free of embroidery, but a close up examination of the collar clearly shows that embroidery is, at the very least, present in the first two inches or so of the open collar.
So that part of the collar cannot be attached until I have finalised the design of the embroidery, which is a subject for a later blog post and, more than likely, its own video.
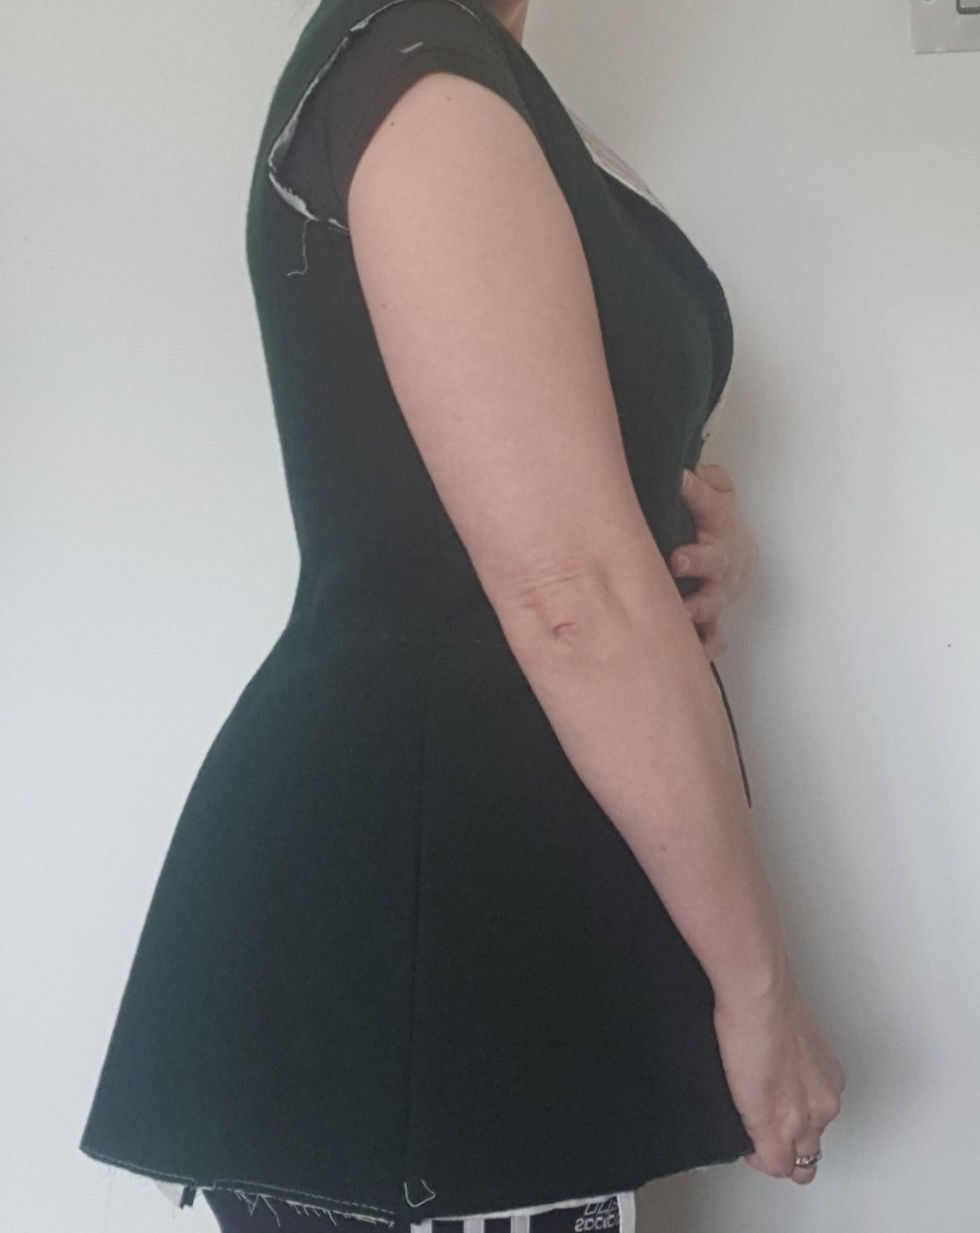
But here is the assembled body of the jacket! Hurrah! We have a 3D thing now! I am really pleased with the fit - there is a little gapping at the back of the armscye, but I am not wearing my corset in this picture (it does alter my posture quite a lot) although I did manage to put a bustle pad on over my regular clothes, and once the sleeves are in, this gapping *should* (in theory!) be corrected.
I always find seeing a garment in 3D for the first time, really rather exciting... what about you? At which point in a project do you start to get really excited to see the finished garment?
I have now finished editing the video which accompanies this blog post, so if you want to see more, check ore :
I have now finished editing the video which accompanies this blog post, so if you want to see more, check out out he
* "Pick up" is the term used by tailors to describe the puckering you get when stitching invisibly, especially on finer, lighter weight fabrics. The existence of the stitching will be visible, even if the actual stitches are not. This is inevitable and unavoidable on lighter weight fabrics - even if you are only picking up a thread or two of your fabric, it will still leave a mark. Sometimes, you can steam out the worst of it, sometimes not. On heavier fabrics, it is not so much of a concern.
I talk about this in more detail on my next YouTube video :)


Comments